
Several outdoor projects, such as siding or anything involving a home’s roof, are better left to professional contractors. However, building a fence is a project that can be done DIY-style.
You can tackle anything from a decorative garden fence to a full-length perimeter fence, as long as you have the right building materials and preparation. Ensure a long-lasting payoff for your effort by following these budget-friendly, fence-building tips.
1. Choose Your Lumber with Care
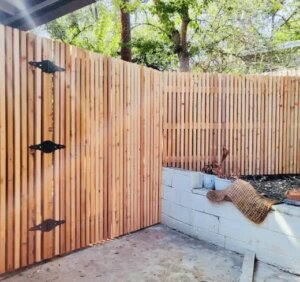
When building wood fencing, it’s important to use quality lumber like Borneo Mahogany, Cedar, Redwood, or Moso Bamboo.
2. Pick a Max Post Spacing
For horizontal fences, posts should be a maximum of six feet apart. Whereas, vertical fence posts can sometimes be slightly farther apart, at eight-foot spacing. Having the right post spacing should provide enough stability and reduce susceptibility to wind damage.
3. Choose Rail Spacing Wisely
Rail spacing is also important when building a sturdy fence. Fence posts that are six feet or higher will need to have three rails versus two. However, if you’re building a smaller decorative fence for your garden or as general backyard decor, two rails are enough to maintain stability.
4. Always Use the Right Screws
When building a fence, always use screws versus nails. As the weather changes, fence boards will swell and shrink, which can cause nails to pop out; whereas, screws will stay put.
Another helpful tip is to use screws that are exterior-coated, and for horizontal fences, in particular, use trim-head screws, which offer a clean, modern look.
5. Stain Your Fence
To preserve the look and integrity of your fence, use an oil-based stain. Popular choices available at all J&W Lumber stores include PPG, Penofin, and Messmer’s, which are available in a variety of colors and are used to condition the wood from the inside out.
Also, it’s recommended to stain everything before putting it up, because the fencing will shrink a little bit and may cause streaks in the stain.
6. Use Treated or Metal Posts
Extend the life of your wood fencing by using treated or metal posts. Even if individual fence boards become damaged and need to be replaced, treated or metal posts can remain intact longer, making repairs easier and saving you money in the long run.
7. Share Costs with Your Neighbors
If the fencing is going to be along a shared property line, talk to your neighbors to see if they’re willing to share costs, particularly if you construct a “good neighbor” fence that is appealing on both sides. This helps with budgeting while adding value for all parties involved.
8. Recruit Kids in the Neighborhood to Dig Holes
Digging holes for fence posts is an arduous task that can be delegated to kids in the neighborhood who want to make summer money. Lay the groundwork with a sample hole showing the diameter, depth, and spacing between holes, and oversee the project to prevent any potential mishaps.
9. Create Stability with Concrete
Installing new fence posts with concrete is made easier with a fast-setting concrete mix, which hardens within 20 to 40 minutes. The trick is to mount the concrete up and around the fence posts rather than just low and flat at the bottom.
Make Your Backyard Look Brand New with a Fence
Map out your fence design ahead of time and prep accordingly to make the day of the build go smoother. J&W Lumber carries all the outdoor building materials you’ll need.
Stop by your local store with any questions or to get pointed in the right direction, and one of our friendly and knowledgeable representatives will be happy to help.